When I play the get-to-know-you game where you're supposed to tell something no one knows about you, I sometimes offer up this tidbit: I once won an apple pie baking contest at the State Fair.
This hasn't always been a little known fact. When I won the contest as a high school junior, everyone seemed to know it, especially after the newspaper that covered the southern end of the state did a full-page feature with the headline: Alison Lowe is Miss American Pie. I couldn't walk down the halls of the high school without hearing catcalls containing the words, "Miss America" or "Pie." For someone as easily as embarrassed as this teenager was, it was not pleasant.
So the years passed and I worked my way back into anonymity. But every once in a while, Miss American Pie can't help it. She has to manifest herself. Especially when the rhubarb is rosy and the strawberries plump. So she bakes. And she shares her baked goods. And when that happens, word gets out.
Well, the word is out, so I might as well share my pie crust recipe, too. Here it is. But first, some pictures.
Start by cutting the shortening into the flour and salt. I use a pastry blender but you could also use two knives. The shortening should be pea-sized or slightly larger when you've finished,
Next add the water. This is key: toss the mixture while slowly adding the water. Do not stir. Start with the minimum amount of water and keep adding until the dough is uniformly moistened.
It should hold together but not be sticky.
Press the mixture into two balls.
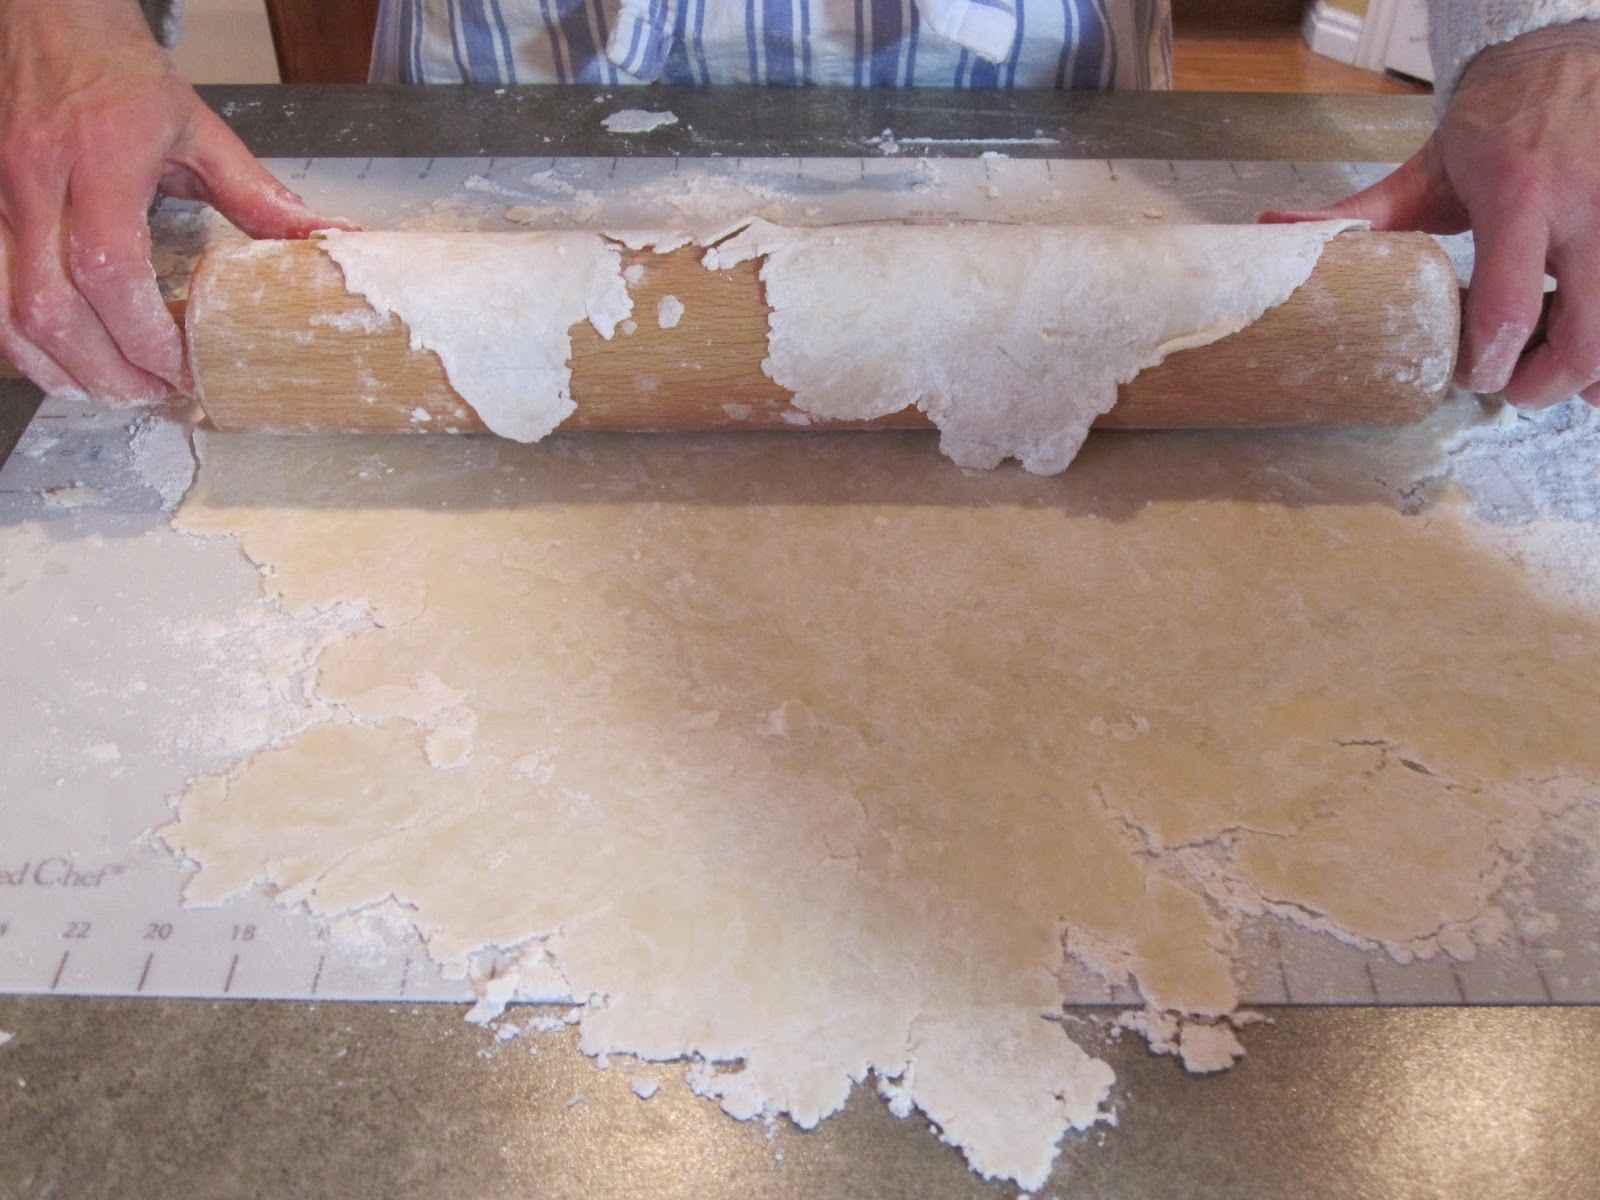
The pastry should be fairly thin when rolled out. Here, I'm using the rolling pin to transfer it to the pie plate.
For a full top crust, I like to put a pie dish on the pastry and cut around it for size. Then I fold the circle of pastry in half, cut slits and transfer it to the top of my filled bottom crust.
For a lattice top, cut the pastry into strips.
And weave them across the top of the filling, like so.
For both styles of top crust, trim the edges, tuck them under and crimp. I'm not the world's best crimper, but as you can see . . .
It still looks nice. Brush on an egg wash or a splash of milk and a sprinkle of coarse sugar.
Baking turns it beautiful. Looks as good as it tastes.

Pie Crust
| 2 1/4 cups flour |
| 1 teaspoon salt |
| 1 cup shortening, (1/2 cup butter can be substituted for 1/2 cup of the shortening) |
| 1/2-3/4 cup water, or slightly more, as needed |
Yield: 2 pie crusts
Measure flour and salt into a large
bowl; stir to combine. Using a pastry blender, cut in the shortening
(and butter, if using), until the lumps are pea-sized or slightly
larger. With a fork, toss the flour/shortening mixture while slowly
adding the water. Continue until the flour is evenly moistened and
starts to cling together. You may need to add additional water to any
dry patches. Gather the dough together and press into two balls. The
dough should hold together but not be sticky. Generously flour a pastry
mat or counter. Flatten one of the balls onto the floured surface and
then roll out with a rolling pin, using a light touch. Use the rolling
pin to transfer the pastry to a 9-inch pie dish. Ease the pastry
loosely into position but do not press it into the pie plate. Add
desired filling.
For a one-crust pie, trim the pastry, tuck ends under and crimp the edges. For a two-crust pie, roll out the second ball in the same manner as the first. Trim to fit. Fold in half to cut slits and transfer to top of pie. Unfold it, tuck the edges under and crimp, For a lattice crust, cut the rolled-out pastry into 1/2 strips and weave across the filling. A lattice crust is especially good for a juicy filling that needs lots of venting as it bubbles. (Berry pies, for example.)
To beautify the top of the crust you can either brush it with one beaten egg plus one tablespoon of milk or water. Or brush it with milk and sprinkle with coarse sugar.
I usually bake my two-crust pies at 350 degrees, no matter what the recipe says, to prevent over-browning. Adjust the baking time a few minutes longer to compensate for a lower temperature, if necessary.
For a baked single crust (for cream pies, etc), prick crust all over with a fork and bake at 350 degrees for 20-25 minutes.
Trouble shooting: if your dough falls apart as you're rolling it out, it's too dry and needs more water. If the finished crust is tough, you may have over-mixed it (remember to toss, not stir), or the shortening lumps weren't left large enough. (Pastry gets its flakiness when the lumps of shortening melt and create little pockets of air.)
.JPG)
.JPG)
.JPG)
.JPG)
.JPG)


